< Smokebox 1 >
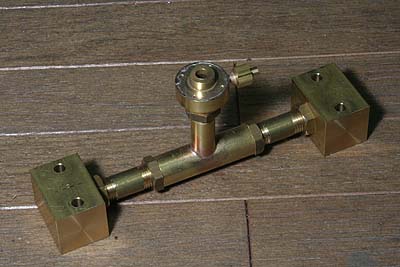 Exhausted steam from the cylinders pass through elbows, gather in a tee
and go out from a blast nozzle. The elbows are made of brass blocks. The
tee is silver-soldered from brass round rods. Horizontal hole of the tee
doesn't penetrate whole pipe so as to avoid interference of the both steam
streams. Left and right holes stop just before the center and are connected
to the upper vertical hole. The elbows and the tee are connected with straight
pipes threaded at both ends. The pipes are secured with lock nuts.
Exhausted steam from the cylinders pass through elbows, gather in a tee
and go out from a blast nozzle. The elbows are made of brass blocks. The
tee is silver-soldered from brass round rods. Horizontal hole of the tee
doesn't penetrate whole pipe so as to avoid interference of the both steam
streams. Left and right holes stop just before the center and are connected
to the upper vertical hole. The elbows and the tee are connected with straight
pipes threaded at both ends. The pipes are secured with lock nuts.
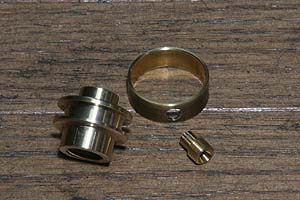
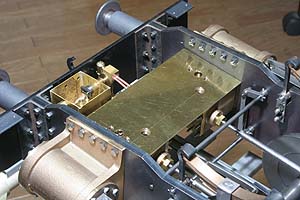
The blast nozzle needs to have steam path from the blower as well. I made a circular chamber around the nozzle by turning a groove around the nozzle center and closing the groove with a brass ring. There are four outlet holes around the center. They are drilled slantwise to the center line. Finally all of the parts are silver-soldered.

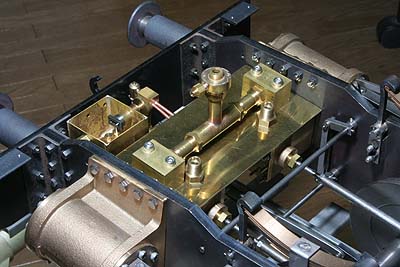
The exhaust unit is bolted on the cylinder blocks through the smokebox base plate. Such a type of assembly must have positioning error due to 'phase' of the screw. I canceled the error with optimizing combination of parts and expanding the holes for bolts in the elbow blocks. On the other hand, the steam regulator and the steam chest will be connected with copper tubes. Here I made nipples for them and screwed into the steam chests. You can see them just inside of the elbows in the photo.
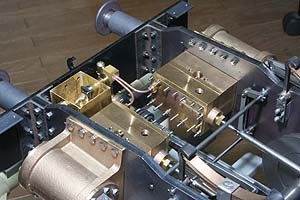
The smokebox base plate thoroughly contacts with the cylinder block so as to pre-heat the cylinders with smokebox heat. The base plate is secured with the exhaust unit and the inlet nipples. As the cylinder blocks tilt, the base plate tilts too.
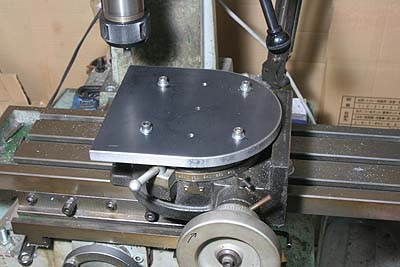
The smokebox is like a dome. Its front and back plates should be flanged like a boiler backhead. I need a 'former' for flanging. I prepared 12mm laser-cutting former and trued it up in the rotary table. Also the surface edge is rounded with R-cutter.
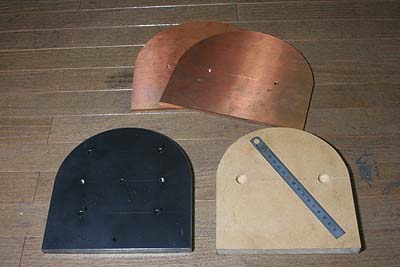
The front and back plates are made of 2.5mm copper sheet. The support plate
is made of 16mm press wood. To avoid creep of the job by hammering, the
copper sheet will be bolted on the former. Note two recesses in the support
plate to avoid the secure bolt heads.
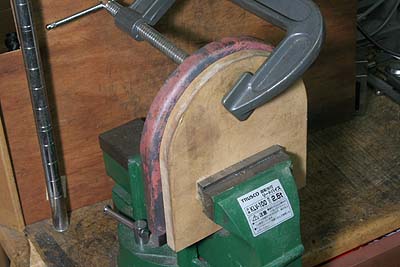
The copper plates are annealed with propane gas torch and sandwiched between
the former and the support plate. Then the edge is beaten with a plastic
hammer for flanging. Note the upper part of the job is grasped tightly
with a big clamper.
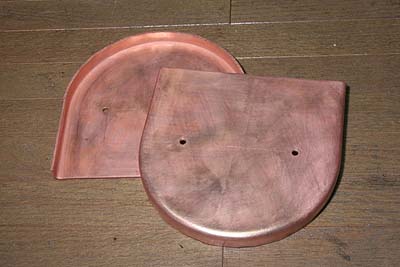
After flanging, they are pickled and ready for assembly. It needed seven times annealing to make the flange square.
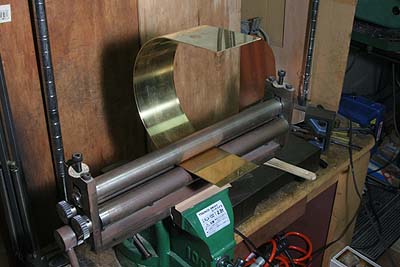
The side plate is made of 1.5mm brass sheet and rolled with the sheet roller. Nasty errors of curvature remain at start and end points of the curve. They will be forcibly trued up by later assembly.
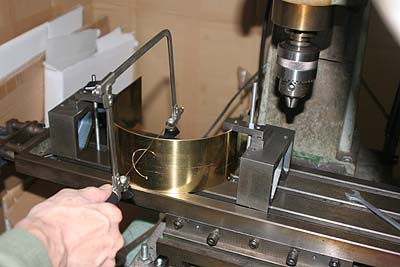
The hole for chimney is cut out with a fret saw. I employed special fret
saw handle that can rotate the saw angle in square steps. Do not cut the
hole before the bending, otherwise the sheet around the hole would be distorted
with the bending.
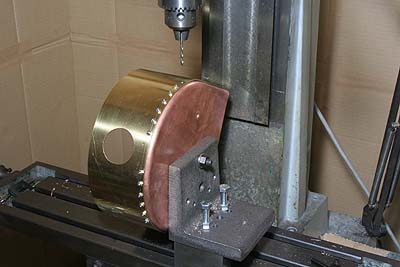
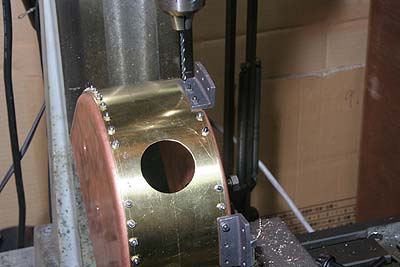
The side plate is tentatively secured onto the flanged plates with 2.6mm screws and nuts. In order to drill vertical holes, I set them up as the photo shows. The drill head is fixed while the flanged plate is rotated around the center bolt. I started from the top and followed towards the both feet. Each hole is drilled through and tightened by screw and nut one by one, so as to avoid gap between the plates.
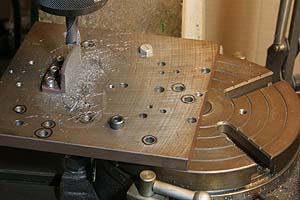
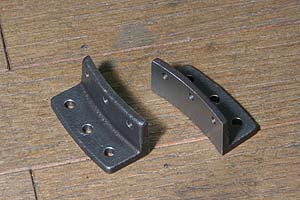
Here I prepared saddle tank brackets that are mounted on the smokebox. They are made of cast iron. Their curved faces are cut in the rotary table.
Some screws in the back array serve as fixing the saddle tank brackets, too. I used 3mm screws here.
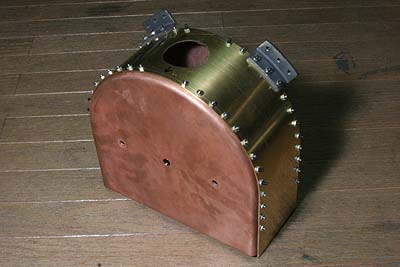
Temporarily assembled smokebox. At present the screws are coming from inside and being secured with nuts on outside. It will be reversed in the final assembly.